
Introduction
The Pathfinder Tool in Adobe Illustrator is essential for creating complex shapes with precision and control. Whether you’re designing logos, icons, or UI elements, mastering Pathfinder will elevate your vector workflow.
🔧 What is the Pathfinder Tool?
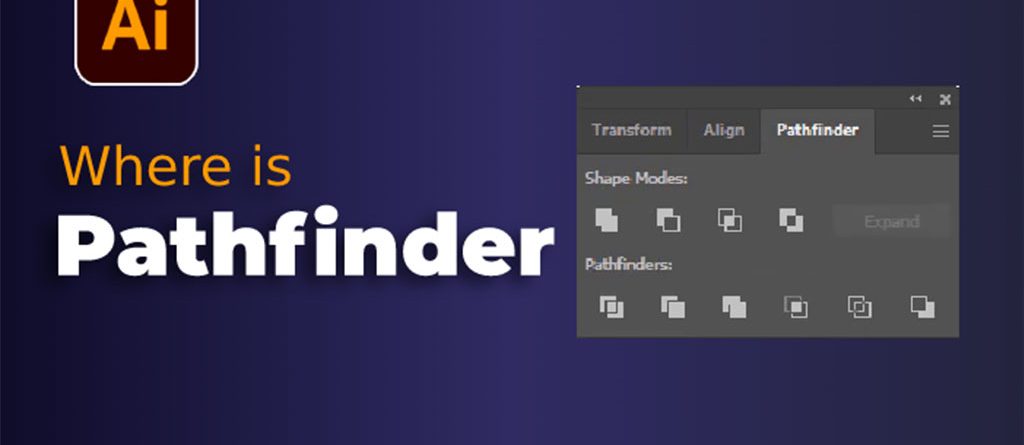
Pathfinder allows you to combine, subtract, intersect, and exclude vector shapes. It’s located under:
Window > Pathfinder
🛠️ Pathfinder Shape Modes (Top Row)
1. Unite
- Combines multiple shapes into one.
- Use case: Creating custom silhouettes.
2. Minus Front
- Subtracts the top shape from the bottom one.
- Great for cutting shapes like punch holes or voids.
3. Intersect
- Only keeps the overlapping area between shapes.
- Ideal for highlights or overlays.
4. Exclude
- Removes the intersecting parts, keeping only the non-overlapping areas.
- Great for creative patterns or layered effects.
🧩 Pathfinders (Bottom Row)
5. Divide
- Splits objects where they overlap into separate shapes.
6. Trim
- Removes overlapping areas without merging objects.
7. Merge
- Similar to Trim, but combines shapes with the same fill.
8. Crop
- Keeps only the area where shapes overlap, and removes the rest.
9. Outline
- Converts filled shapes into stroked paths.
10. Minus Back
- Opposite of Minus Front — subtracts the bottom shape from the top.
📸 Illustrations
A visual step-by-step guide should accompany each tool above. You can capture screenshots in Illustrator demonstrating:
- Before and after each pathfinder action
- Mouse click or menu selection
- Shape results side by side
✅ Tips for Best Use
- Always duplicate your original shapes before applying Pathfinder.
- Use Expand after applying to finalize shapes.
- Combine with the Direct Selection Tool for finer edits.
💡 Conclusion
Mastering the Pathfinder Tool will significantly improve your workflow in Illustrator. It’s a cornerstone of professional vector design, offering both speed and flexibility.


Leave a Reply